How I Organized My Art Studio
How I organized my art studio
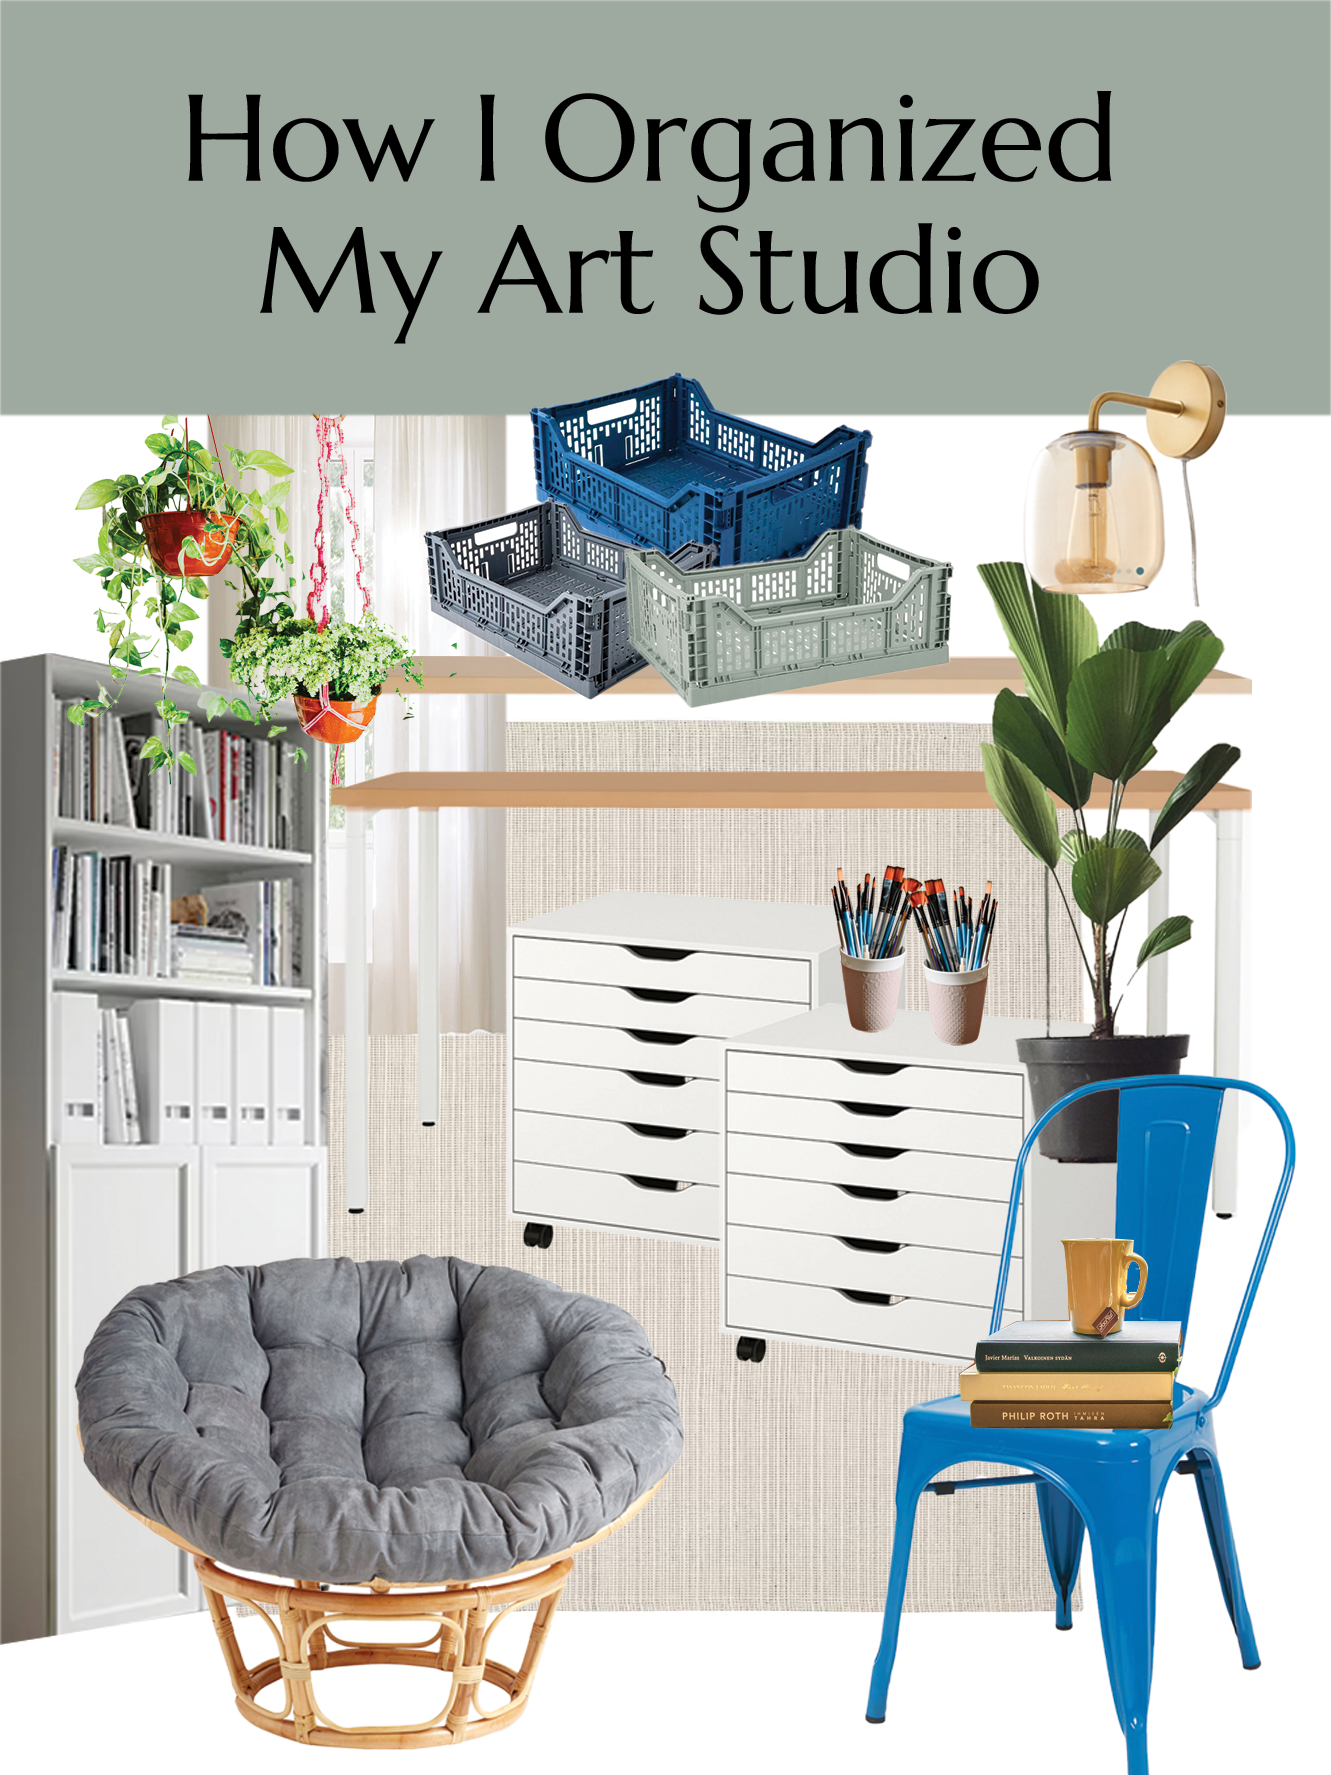
I recently moved into a new art studio! I wanted my new space to be both functional and inspiring, Here’s how I’ve designed and organized it. First, I collected lots of inspiration on my Pinterest board. First, I created separate zones to streamline my workflow. Each area serves a specific purpose to help me stay (somewhat) organized.
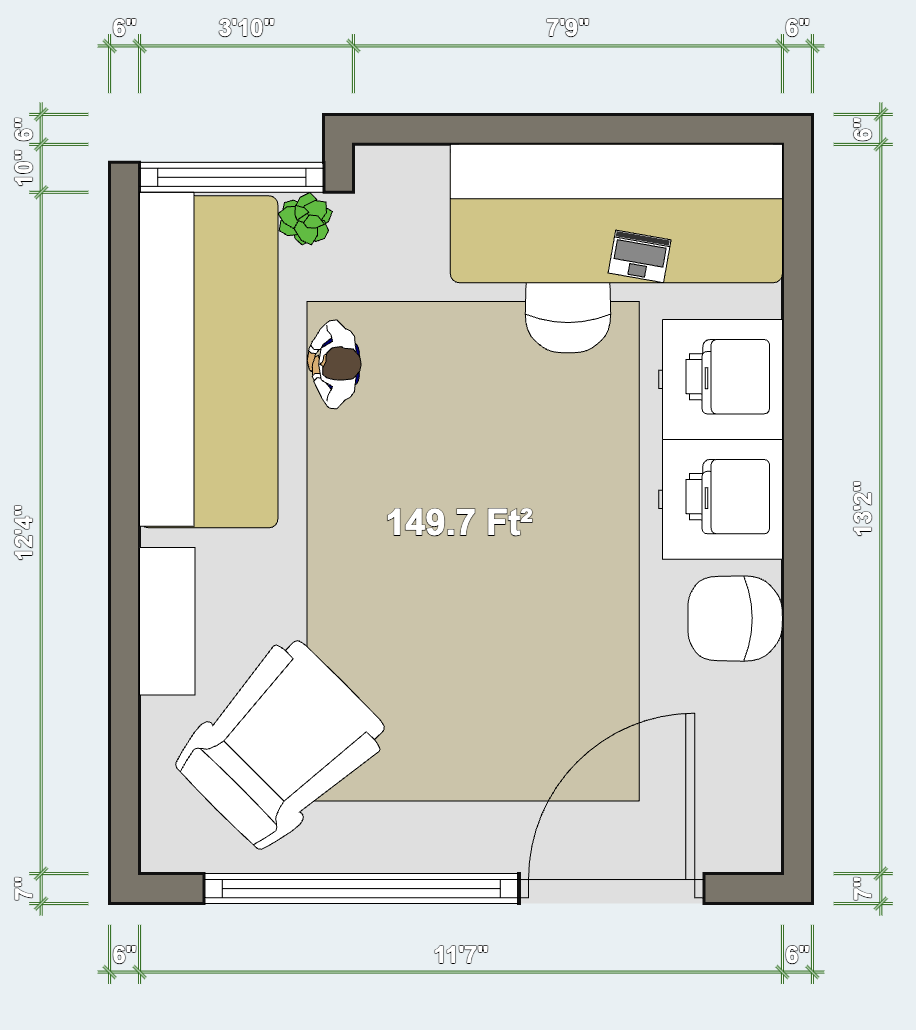
Image created with https://floorplancreator.net/
Art-making zone
I created a dedicated area for art-making by the window. I hung my most-used art supplies on SKADIS pegboards from IKEA, and the rest are stored in these boxes on mounted shelves above my desk. Photography equipment is also stored within reach so I can easily take photos. I also mounted a CANVAS tripod on the shelf so it’s ready to film and share my process.
Packing and shipping zone
Packing orders is not my favorite activity, so I’ve done my best to make it as efficient as possible. Everything is laid out from left to right in the order I use it: cards and prints, business cards, shipping mailers, postal scale, and finally my shipping label printer. I used collapsible plastic crates in different sizes to corral everything.
Inspiration zone
I bought myself a dorm-favorite papasan chair to create a cozy spot for reading, writing, and drawing. I put my bookshelf in this corner too, which has my design books and sketchbooks in it.
Bringing inspiration to the space
Finally, I want this space to feel warm and inspiring. Each corner will be filled with items that bring me joy and serve to warm up the space with natural textures:
Ceramic tumblers for brushes and tools
Art on the walls
Objects from my travels
Plants by the window
Natural wood textures and a jute rug to warm up the space
I hope this space will be a place where I can create, share, and connect. Whether through process videos, packing orders, or welcoming you in person to my studio, I can’t wait to share my space with you!
